VMWare VSphere | Post Install | Guest Customization
The scripts have been designed to run Post Deployment to install any Applications, Configurations, Scripts etc that can not be included as part of the core image, before SysPrep, so could be used within VSphere, Hyper-V or any standalone master image you create for the use of mass deployment
The below has been documented to be used within the V-SPhere to create Virtual Machines and Guest Customization
1 – Create V-Sphere Virtual Machine
Create a Virtual Machine as per your standard practice and install any applications, scripts that can be part of the core image (before SysPrep) and exclude any applications, configurations tasks that need or you wish to be performed Post Deployment.
Or keep your Image pure, so make no changes to how it, after it has been downloaded from Microsoft VLSC and run all configuration and installation within the script post deployment.
2 – Create Staging Folder
In your Virtual Machine create the folder C:\Temp\PostInstall
3 – Copy Post Installation Scripts
Copy the contents of the below link
CommunityHelper/OSDPostInsall at master · Drakey2000/CommunityHelper (github.com)
Into the folder C:\Temp\PostInstall
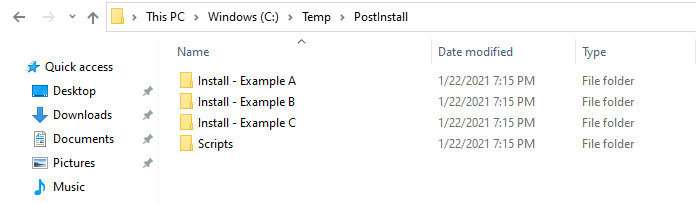
4 – Create Application, Customization Sub Folders
Create a sub folder for each application, configuration tasks you wish to run post deployment.
For example, agent installs like Configuration Manager Client, SQL Server, Symantec Endpoint Protection or any other applications, configurations script, batch files you wish to execute post-deployment.
Example Folder Structure
5 – Add Application, Customization Source Files
Within each sub folder add all the source files for the application, configuration to execute. Such as .msi, .exe, .mst, .bat, .vbs, .ps1 for that particular package.
6 – Customise Spawn-Packages.ps1
Update the PackageList of the Spawn-Packages.ps1 script ( C:\Temp\PostInstall\Scripst\Spawn-Packages.ps1) with all the applications, configuration source folders and their run commands, silent switch, parameters etc.
Example PackageList
  # Example A
  $packageList += [PSCustomObject]@{
        Name = 'CCMAgent 5.0.9012.1010'
        FolderPath = 'CCMAgent 5.0.9012.1010\ccmsetup.exe'
        Arguments = '/mp:SMSMP01 SMSSITECODE=S01'}

  # Example B
  $packageList += [PSCustomObject]@{
        Name = 'SEP 12.1.6306.6100'
        FolderPath = 'SEP 12.1.6306.6100\Sep64.msi'
        Arguments = '/qn symreboot=reallysuppress'}

  # Example C
  $packageList += [PSCustomObject]@{
        Name = '1E Agent  7.10.263'
        FolderPath = '1E Agent  7.10.263\1EAgent-x64.msi'
        Arguments = 'REBOOT=ReallySuppress /l*v %TEMP%\1EAgent-x64-Install-7.1.0.263.log /qn'}
Note : C:\Temp\PostInstall will automatically get prefixed to the PackageList Folder
7 – Convert VM to Template
Convert your Virtual Machine with the contents of ‘C:\Temp\PostInstall’ to a VM Template
8 – VM Sphere Customization File
In the VSphere Console Create your Customization File adding the following command to the Run Once option
Powershell.exe -WindowStyle Hidden -NoProfile -ExecutionPolicy Bypass -File “C:\Temp\PostInstall\Scripts\Start-Install.ps1”
Note – Set ‘Number of times to logon on automatically’ under the ‘Administrator Password’ section to 1
VSphere Customization Documentation – https://docs.vmware.com/en/VMware-vSphere/6.7/com.vmware.vsphere.vm_admin.doc/GUID-EB5F090E-723C-4470-B640-50B35D1EC016.html
9 – Create VM from Template
Now when you create a new virtual machine from Template and select the customization file, the Start-Install.ps1 will be called during the first logon and run your PackageList
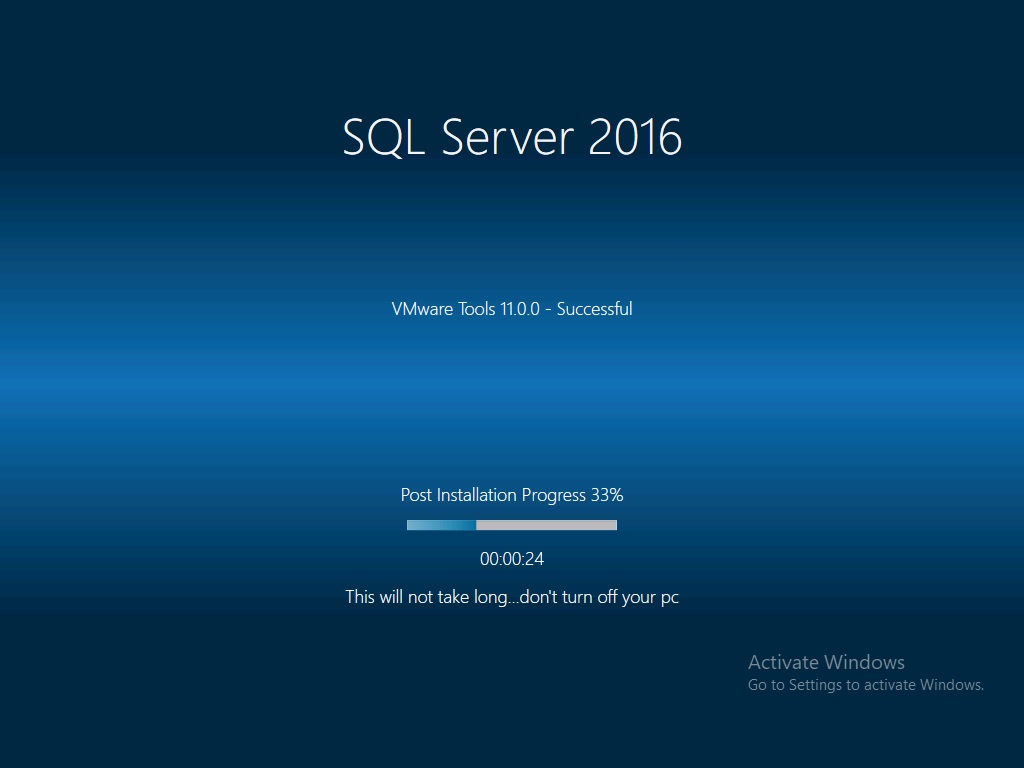
During the execution of the scripts you will be presented with the following Splash Screens (examples)
Post Installation – In Progress
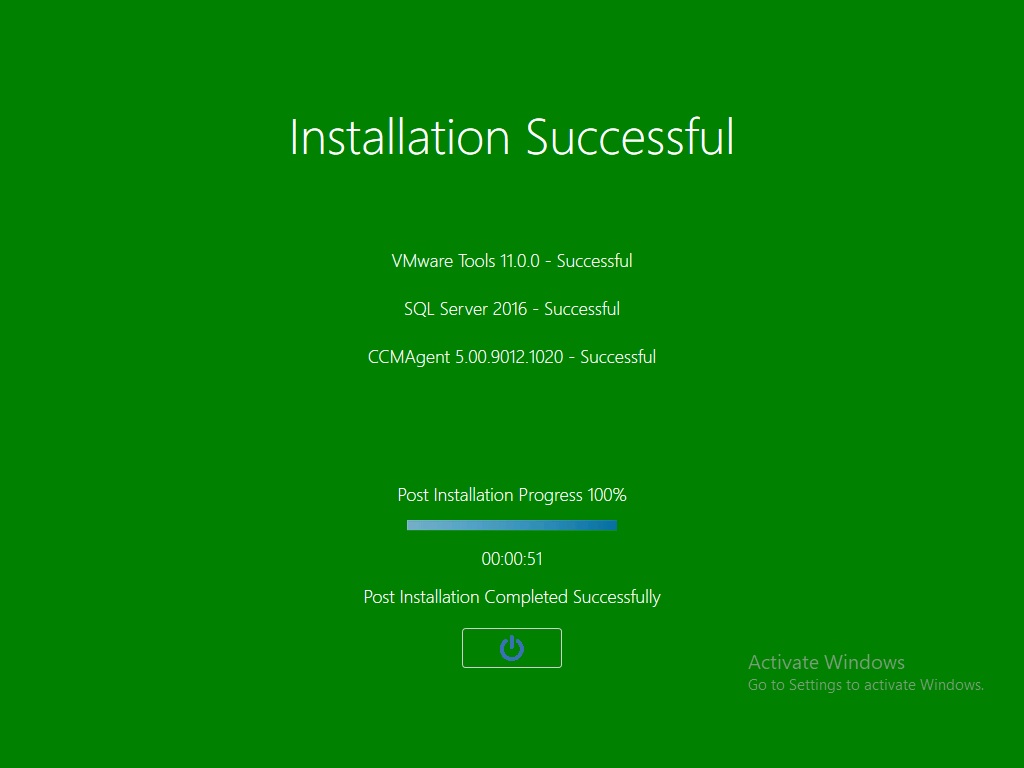
Post Installation – Success
Post Installation – Failure

10 – Post Installation – Clean-Up
If all tasks complete successfully the folder C:\Temp\PostInstall and contents will be deleted and the computer Restarted
If any task failed to execute the folder C:\Temp\PostInstall and contents will remain, and the computer Restarted
By default the above has been turned off, until you are happy it is working then you can change the Boolean Flag in the script Start-Install.ps1 from ‘$CleanupAndRestart = $False‘ to ‘$CleanupAndRestart = $True‘
Check the video out to see it in action…very boring, not sure why I even posted it !
The same method can be used for a standard installation that uses SysPrep and Unattended xml and AutoLogon outside of VMWare VSphere
The script will not handle restarts once it has started to run, so ensure that all the applications and scripts suppress auto restart after successful completion.
First Logon Commands Documentation – https://docs.microsoft.com/en-us/windows-hardware/customize/desktop/unattend/microsoft-windows-shell-setup-firstlogoncommands

Hello,
When I specifiy .exe and .msi file with arguments like your examples, it fails instantly, with error that it cant find the specific file.
Here is what im trying to use:
$packageList = [ordered]@{
‘SCOM 2019 Agent’ = ‘SCOM\MOMAGENT.msi /qn USE_SETTINGS_FROM_AD=0 USE_MANUALLY_SPECIFIED_SETTINGS=1 MANAGEMENT_GROUP=Test-MG MANAGEMENT_SERVER_DNS=test-ms-01.test.local MANAGEMENT_SERVER_AD_NAME=test-ms-01.test.local SECURE_PORT=5723 ACTIONS_USE_COMPUTER_ACCOUNT=1 AcceptEndUserLicenseAgreement=1’
‘SCCM Client’ = ‘SCCM\ccmsetup.exe SMSSITECODE=Test /UsePKICert /NoCRLCheck CCMHOSTNAME=sccm-test.test.local /MP:sccm-test.test.local’
}
I cant figure out how to put in the arguments without it fails?
Could you help me.
LikeLike
Thanks for taking a look at the site, and sorry it’s not the perfect start! There was an oversight from me……Hopefully, this has been corrected, and the script ‘Spawn-Packages.ps1’ has been updated to reflect this.
Please download the latest Spawn-Packages.ps1 and overwrite the one you have, then update the ‘new’ PackageList……..which now has arguments being passed in separately to the application….. an example is below
# SCOM 2019 Agent
$packageList += [PSCustomObject]@{
Name = ‘SCOM 2019 Agent’
FolderPath = ‘SCOM\MOMAGENT.msi’
Arguments = ‘/qn USE_SETTINGS_FROM_AD=0 USE_MANUALLY_SPECIFIED_SETTINGS=1 MANAGEMENT_GROUP=Test-MG MANAGEMENT_SERVER_DNS=test-ms-01.test.local MANAGEMENT_SERVER_AD_NAME=test-ms-01.test.local SECURE_PORT=5723 ACTIONS_USE_COMPUTER_ACCOUNT=1 AcceptEndUserLicenseAgreement=1’}
# SCCM Client
$packageList += [PSCustomObject]@{
Name = ‘SCCM Client’
FolderPath = ‘SCCM\ccmsetup.exe’
Arguments = ‘SMSSITECODE=Test /UsePKICert /NoCRLCheck CCMHOSTNAME=sccm-test.test.local /MP:sccm-test.test.local’}
LikeLike